
Children love to explore. It is how they learn best! You can take them to a museum to show them an historical artifact or a piece of art, and they might have a lovely time, but how much are they going to remember once they have returned home? If you give them an opportunity to roll up their sleeves to handle and use artifacts, they will remember them because they will remember the fun!

Adding History Mystery Boxes to your educational programs is a fantastic way of encouraging your visitors, young and old, to explore your collections, and this will add a whole new demention to your educational programs. They are versatile because they can be switched up in a number of ways. When one History Mystery Box gets old, a new one can be created, keeping them fresh. They can be part of an in-house exhibit, they can be taken to a school as part of an out-reach educational program, or they can be used as part of an in-house educational program.
The idea behind these History Mystery Boxes is rather simple. Before you begin you will want to develop a few learning objectives – what do you want your visitors/students to learn? Let’s say you are interested in creating an exhibit that explores the various behind-the-scene jobs servants performed in a Victorian house. Next you will need a vessel (a box) to put our exploration items in. If this “box” can also be used as part of the collection, all the better! Based on your learning theme begin to find artifacts in your collections to fill the boxes. Make sure the items you select can take a lot of handling, also do not select items that may have a sharp edge, you do not want your visitor/students to get hurt.
Work Around the Victorian House:
| Box | Items in the box |
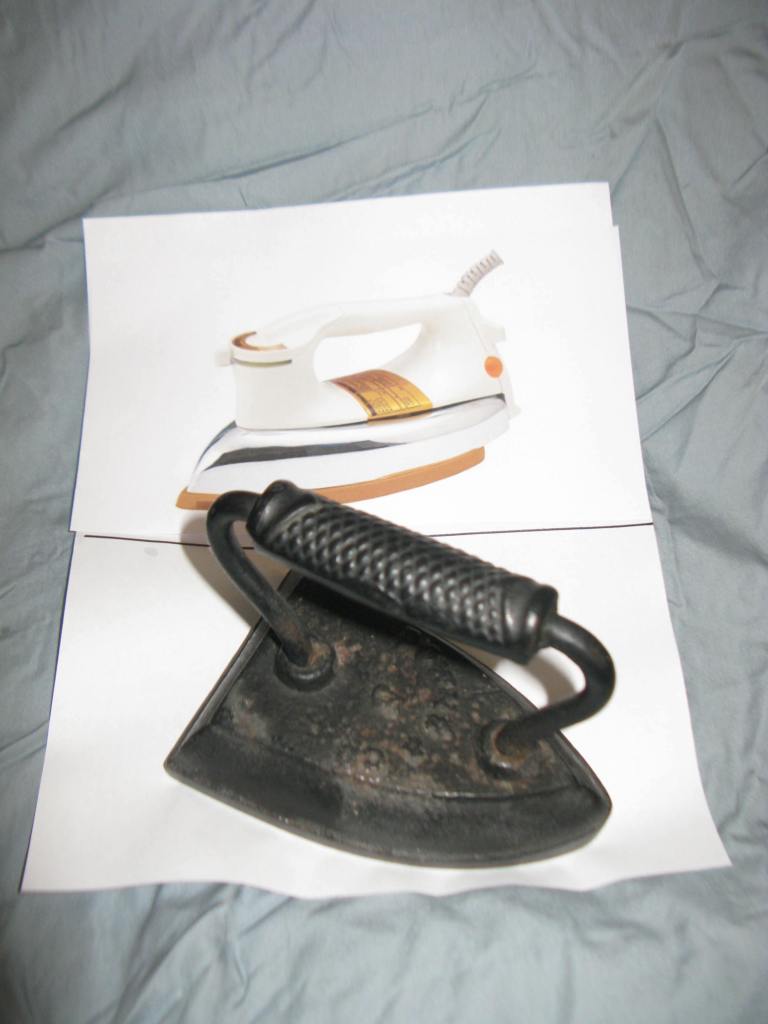
| Wash tub | Scrub board Bar of soap Iron Piece of linen/muslin Darning form |
| Tool Box | Mallet Measuring stick Screw driver Nails |
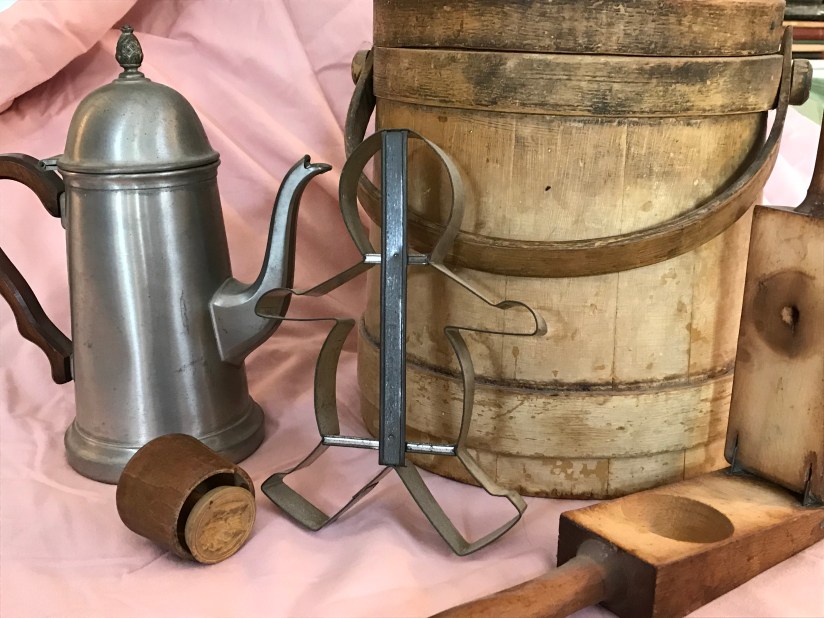
| Flour Box | Butter press Cookie cutter Rolling pin Apron Tea pot |
Once you have the items for the boxes selected, you will want to create the content that supports your lessons’ objectives. For young children you could provide laminated pictures of the modern equivalent of the artifact in your Mystery Box. Questions such as: What do you notice about the artifact? Is it heavy? What size is it? What do you think it was used for? Encourage them to think like a historian and this may spark a discussion. If you are using the Mystery Boxes in a small group setting, give each group a chance to explore each box. Having a follow up activity to reinforce your lesson. In this case, the children could each receive a sewing card, a laminated card with holes poked in them and a piece of yard (with a tape on one end and a knot on the other), then they can sew!
Mystery Boxes can also be used with seniors. Items selected from your collections should definitely have a theme and you can include items that may be a bit more delicate, and could be part of a PowerPoint presentation. Instead of playing a matching game with your laminated cards, you could use them to see if the seniors can recall the old fashioned name(s) for various artifacts, or the artifact could be displayed on the PowerPoint screen for easy viewing, and seniors could be asked to identify the object. They may even recall a parent or grandparent using the artifact. This may spark a conversation, and if recorded can be part of an oral history which ties into your exhibit.
Mystery Boxes are an excellent way to teach a lesson, show off some of your collections, and allow your visitor/students to interact with your exhibits. They can be tailored to young or old and are a fun and exciting way to create a spark!
